Welcome to Rima 👋
Thoughts from our team
We hope that your work and life gets better and that you can enjoy the moments that matter because of Rima. We will try our best to make things better for you over time. We will share our thoughts, elaborate on the product and hopefully give you the confidence to be on this journey with us.
First, lets get grounded
Our Vocab
Blueprints
A Blueprint is a saved automation — it's how you translate your knowhow into an executable workflow. For example you can tell the Rima agent to "Take details from an ADP payroll report, and populate an excel template to be uploaded into quickbooks."
These instructions are codified into a Blueprint that can be run anytime when you need to do that work. All you need are the new set of inputs and you can execute the task
Runs
A Run is a single execution of a Blueprint.
The Three Foundational Steps
Every Blueprint follows three foundational steps:
Extraction
Starting with extraction, you can tell Rima what information to extract from your uploaded files. E.g. "Get me dates, amounts, descriptions, and reference numbers from the bank statements." Rima reads the documents and pulls out structured data and shows you for confirmation in a visual manner.
Processing (Optional)
This second foundational step is an optional step in case you need to perform any transformations on the data you extracted. E.g. "Match bank transactions to ledger entries by date and amount." in a scenario where you uploaded bank and ledger data. The Rima agent uses all the context it has to execute the task in this step
Output
This is where you define your final deliverable and formatting e.g. "Generate an Excel report with matched transactions, flagging anything unmatched for review." or if you uploaded an output template, you tell Rima how to fill in that template. This step generally takes a bit more time, since templates can be tricky, we are working to make this a lot easier for you to complete.
Creating a Blueprint
To create a Blueprint, start by
Uploading the example files you'll need and tagging them as best you can
Then the fun begins — Chat with the agent about what you want to get done; the agent will ask you about what to extract, any operations you would like to do on the extracted data and how you would want the output to look like.
The agent will then execute your instructions and present you with results (if it runs into issues it will ask for additional guidance).
You can see all the prompts / code generated if you would like to be specific or make changes that the agent is not able to get. In general you should not need to edit these. Simply chat with the agent and observe the outputs.
You can always roll back to a prior output version if the agents current version is not suitable for you.
Tips for Getting the Best Results
● Be specific about what you want extracted:
●Use the feedback loop: Don't just say "looks good" if it doesn't. Tell Rima exactly what's wrong:
Building Trust
Rima shows its work. Every extraction shows you exactly what was pulled from which document. Every processing step shows interim results. Every prompt file is readable and editable. You're never flying blind.
If something looks wrong, tell Rima. It'll adjust and re-run. If the adjustment makes things worse, roll back. The goal is to get you to a result you trust, iteratively.
Credits and how best to maximize them
Rima runs on credits; actions you take such as running extractions, creating workflows and generating outputs consume credits. You can think of credits as fuel for the machine — the more stuff you do, the more credits get consumed.
Different user tiers have different credit limits (among others e.g. Blueprint limits, pages processed limits).
To maximize your credit usage, here are some tips:
How Rima assists with your accounting workflows
Rima is designed to handle repetitive PDF and Excel tasks by learning your firm's specific logic and document structures.
Reconciliations & Ledger Management
Data Extraction & Documentation
Analysis & Review
Custom Workflows
If you have a specific document process not listed here, you can describe the steps to Rima, and it will learn how to execute that workflow for you.
Setting up the Excel Add-In
Pre-requisites - you'll need a business and not a personal account
Download it from the Microsoft store here
To ensure its properly setup, open up an excel spreadsheet
- Go to your add ins
- Search for the Rima AI add in
- Add it
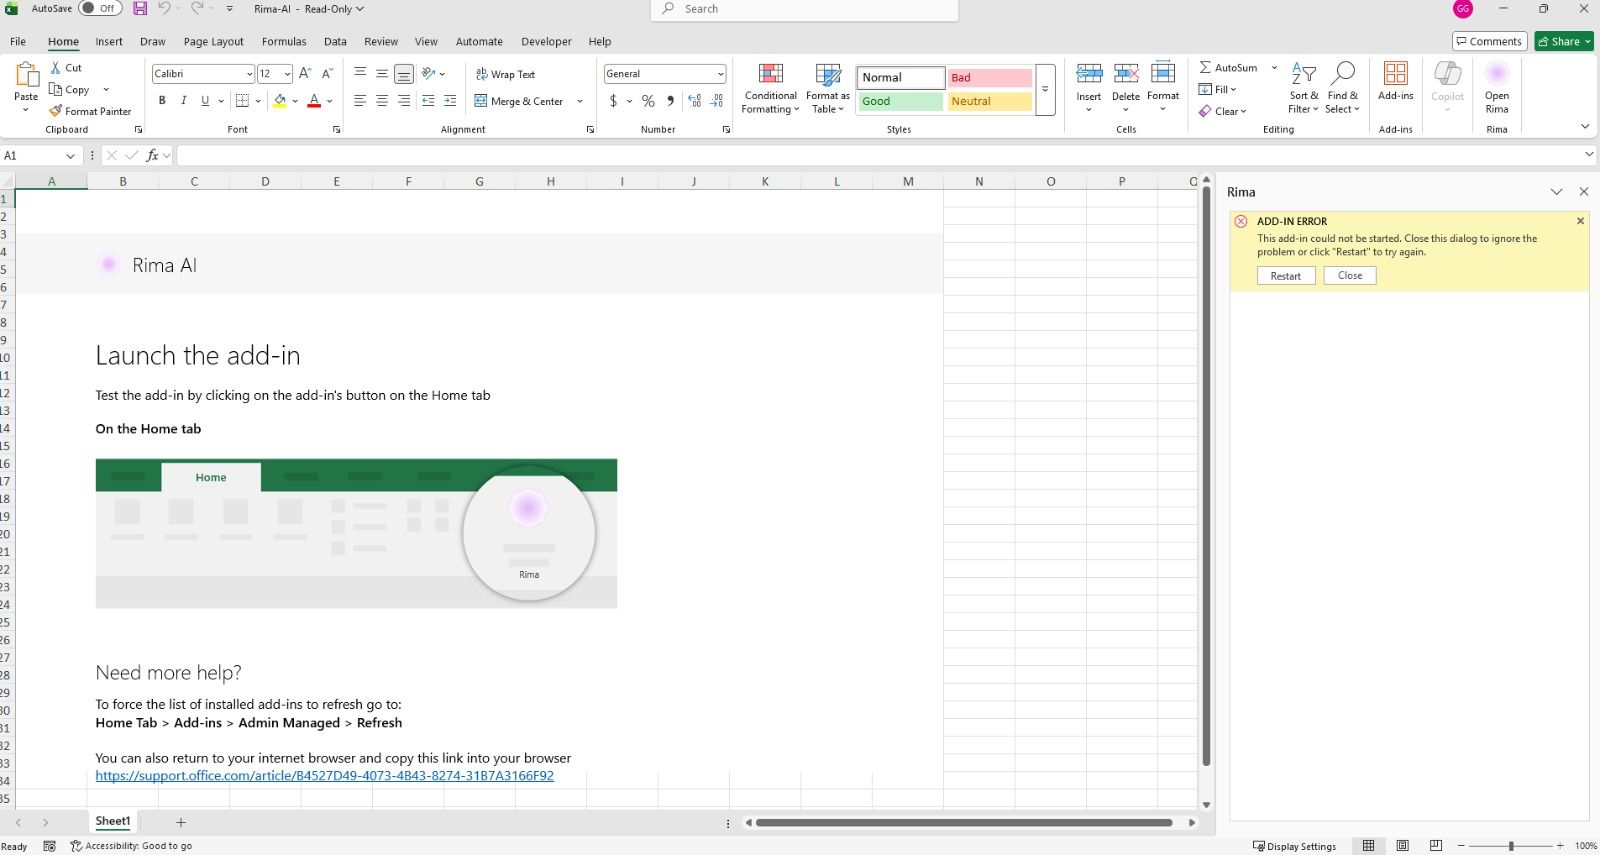
- Ensure that the same account that was used to download the add in from the store is the account you use to open it in excel, otherwise it throws an error.
To visualize data with the add in, you'll need to execute a Blueprint from the rima application and download the output. The output file from Rima is needed for the Add in to work. It won't work with any blank file due to lack of context.
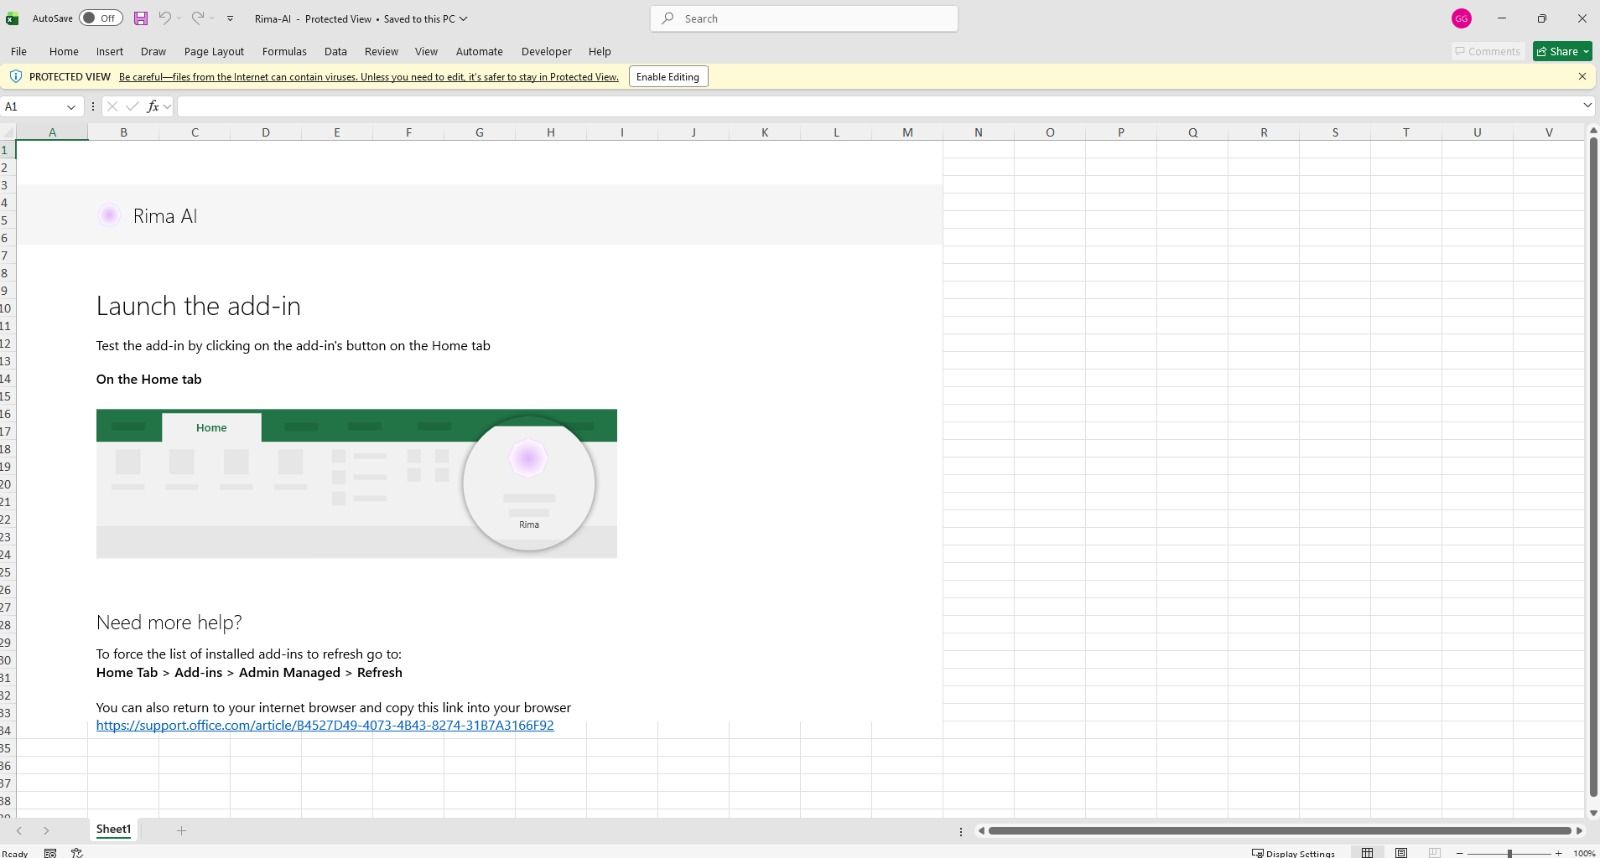
When you download the add in for the first time, this sheet will be downloaded. You can enable editing and proceed to adding the add in.
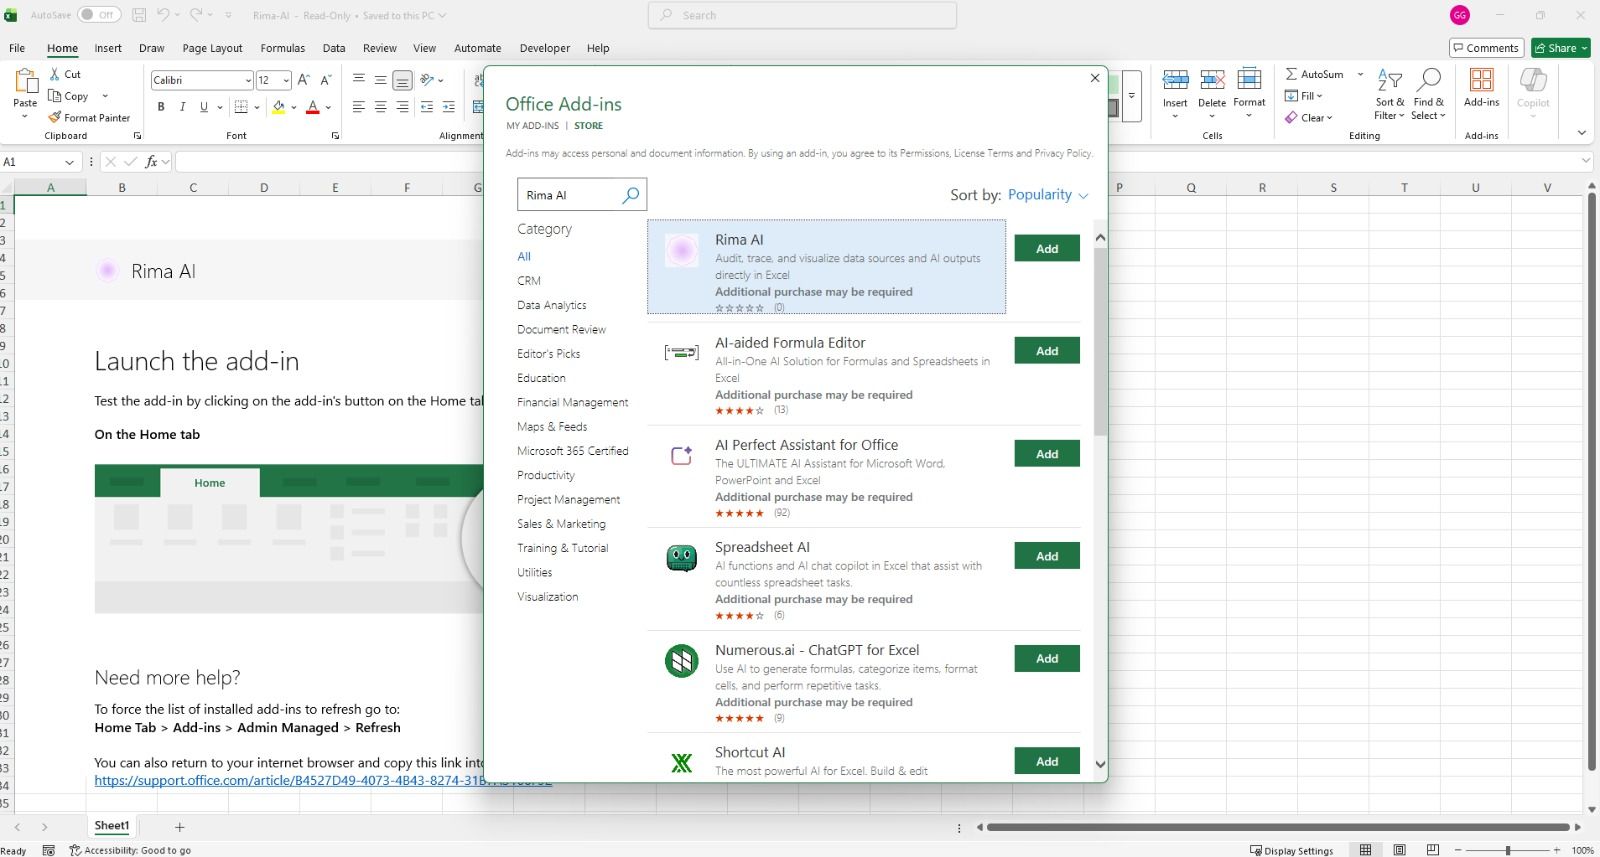
In the top right task bar, you will see the add in button. Click on that to see all add ins.
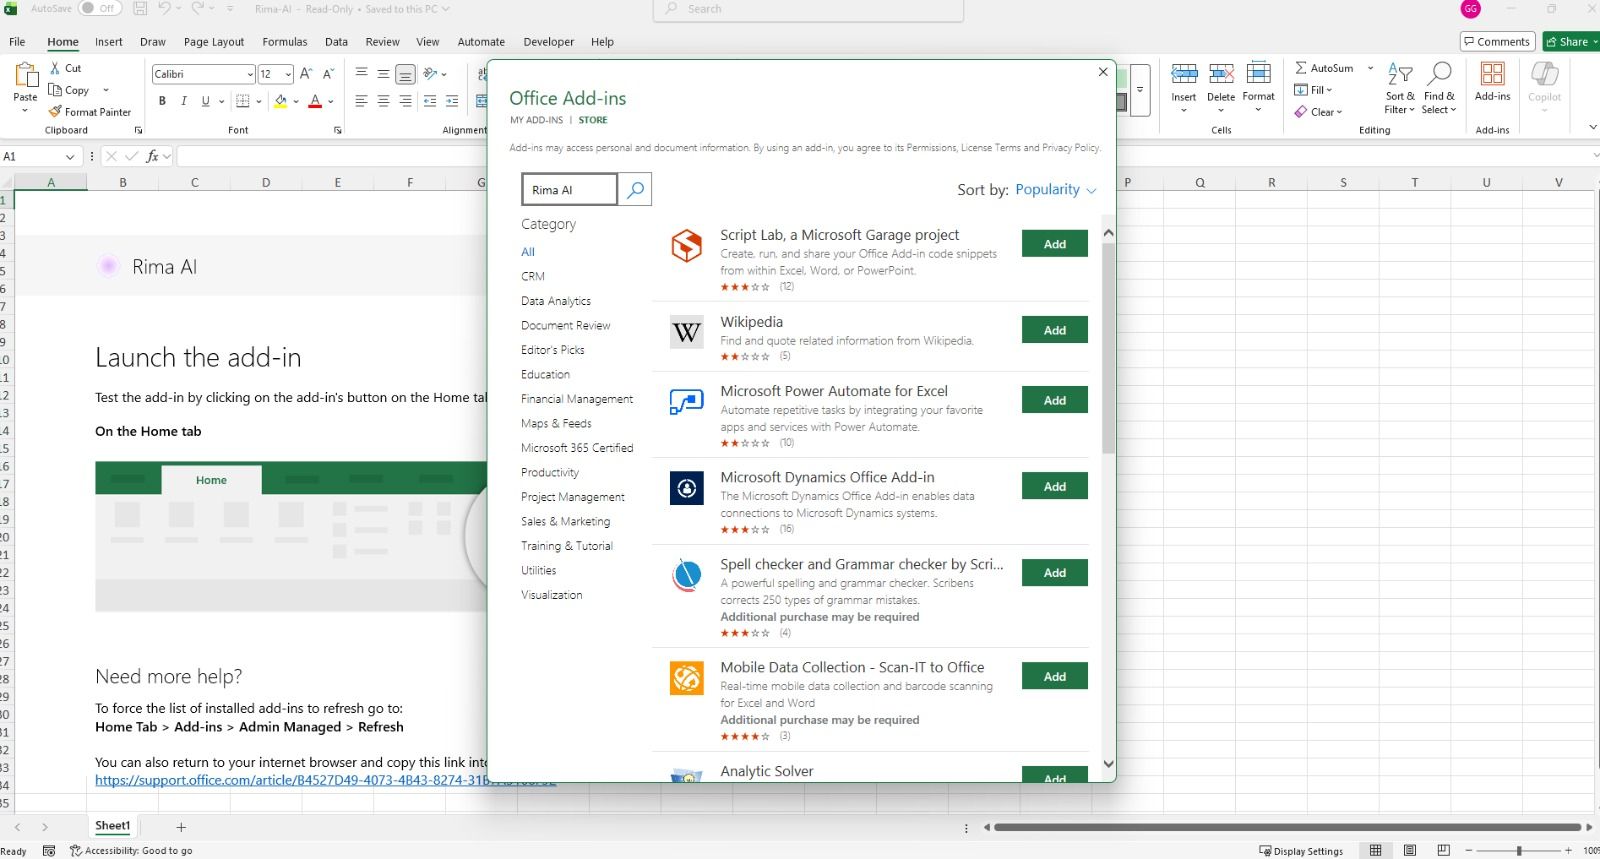
Search for Rima AI add in
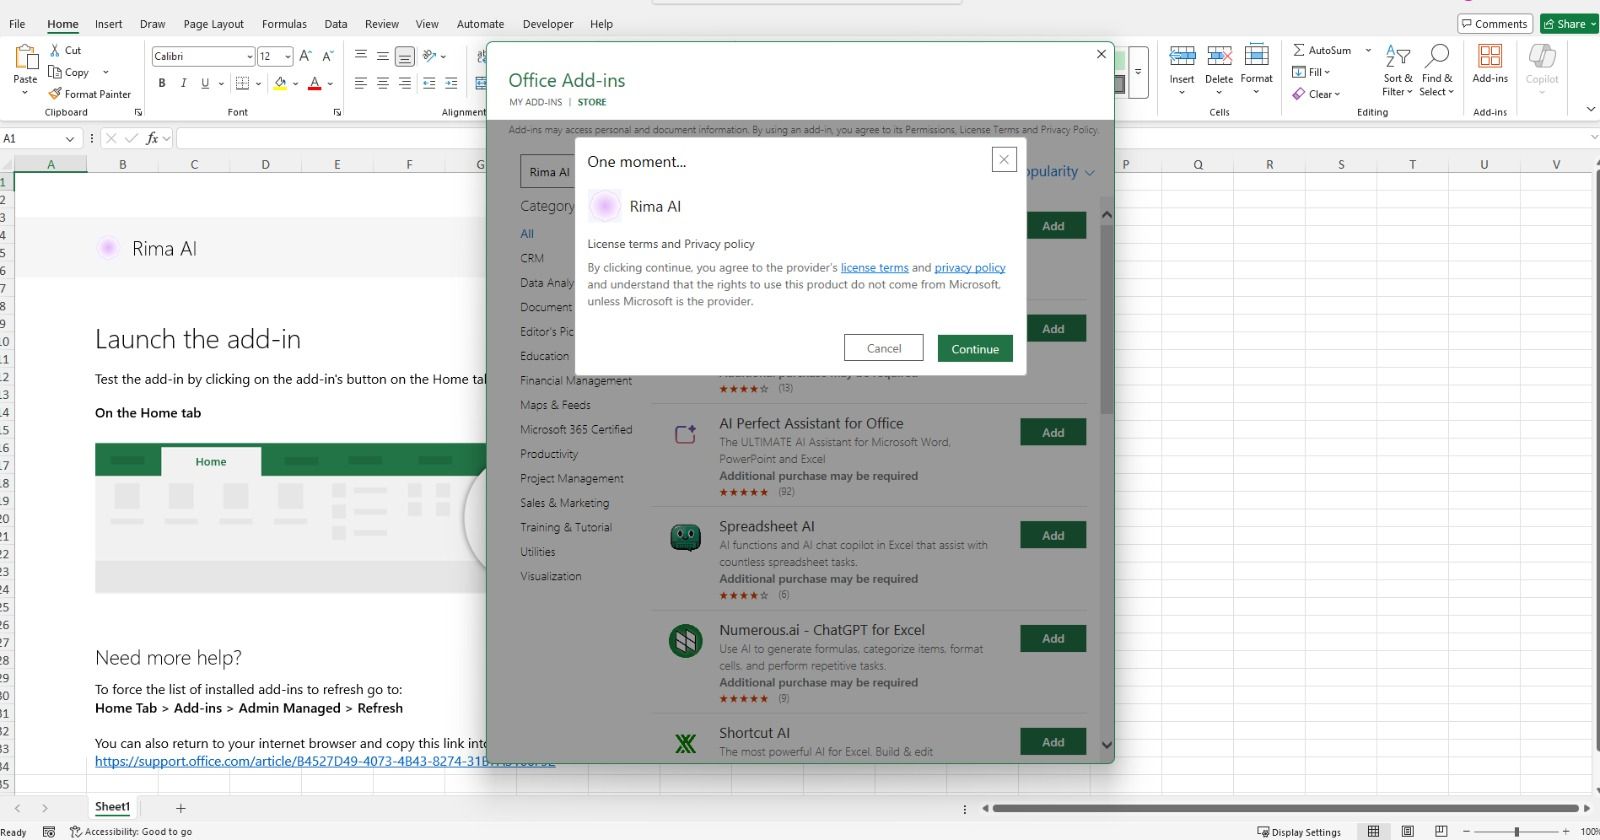
Continue once you review the privacy policy.
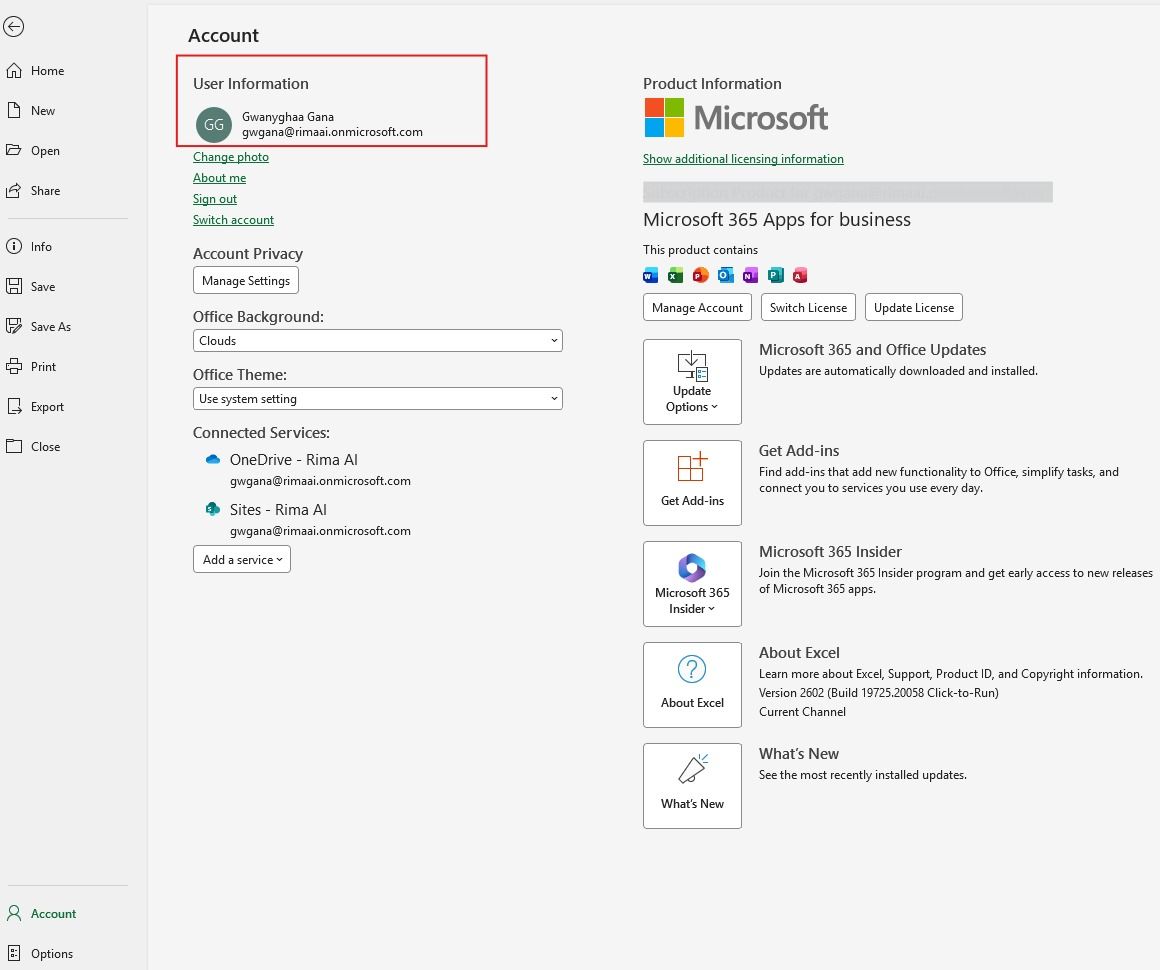
If you see this error, ensure that you are using the right account that downloaded the add in e.g. if you have both a personal and a work account, your work account is likely the one to use. Go to your File menu, then account and ensure that the right account is selected (see below)